v Nowadays, Object storage services is mostly used because it allow storing files as objects in any volume of data and because of it data availability, scalability and security. We can upload files in OCI object storage up to 2GB through web console. And For larger files we can use multipart upload using the API, Java SDK or Command Line Interface(CLI) .
So, In this post I have explained how can we upload/download files from on-premises to OCI through CLI.
Step 1: Install
OCI Command Line Interface (CLI)
[prodtestdb@oracle
~]$ bash -c "$(curl -L
https://raw.githubusercontent.com/oracle/oci-cli/master/scripts/install/install.sh)"
|
|
Step 2: Note down the following information for setup OCI Configuration
|
(i)User OCID: ocid1.user.oc1..aaaaaaauxyi78jw2jpvnae5zoucnvxhppqnpa3f5lnfuciphzwrtq (ii) Tenancy OCID: ocid1.tenancy.oc1..aaaaaaai3xkchy9xacyqsdpg7ncdoeeit0eirwcot66gqvnm2ntvipv4va (iii)Region: ap-mumbai-1 (i) Go to ->User settings |
Step 3: Now, We need to run one time OCI configuration process that will store a
config file under the ~/.oci directory.
[prodtestdb@oracle ~]$
cd /home/prodtestdb/bin
[prodtestdb@oracle ~]$
ll
total 8
-rwxr-xr-x 1
prodtestdb dba 235 Dec 09 17:09 oci
drwxr-xr-x 2
prodtestdb dba 4096 Dec 09 17:09 oci-cli-scripts
Ø
configure
the CLI using “oci setup config” command.
[prodtestdb@oracle ~]$ oci setup config
Step 4: Now, OCI CLI by default authenticate information from $HOME/.oci/config so if tenancy OCID, user OCID & default region not present in config file then we must create it manually.
|
[prodtestdb@oracle ~]$ cd ~/.oci [prodtestdb@oracle ~]$ pwd /home/prodtestdb/.oci [prodtestdb@oracle ~]$ ll total 12 -rw------- 1 prodtestdb dba 397
Dec 09 21:47 config -rw------- 1 prodtestdb dba 1675 Dec 09 21:46 oci_api_key.pem -rw------- 1 prodtestdb dba 451
Dec 09 21:46 oci_api_key_public.pem Add Tenancy OCID in compartment_id: [prodtestdb@oracle ~]$ vi
/home/prodtestdb/oci/config |
|
[DEFAULT] user=ocid1.user.oc1..aaaaaaauxyi78jw2jpvnae5zoucnvxhppqnpa3f5lnfuciphzwrtq fingerprint=29:33:7c:1a:0d:ec:d2:88:10:fc:91:86:c4:a1:a8:1b key_file=/home/oracle/.oci/oci_api_key.pem tenancy=ocid1.tenancy.oc1..aaaaaaai3xkchy9xacyqsdpg7ncdoeeit0eirwcot66gqvnm2ntvipv4va region=ap-mumbai-1 compartment_id= ocid1.tenancy.oc1..aaaaaaai3xkchy9xacyqsdpg7ncdoeeit0eirwcot66gqvnm2ntvipv4va |
Step 5: Now, we will upload the oci_api_key_public.pem as API key through OCI web console.
|
(i) Copy oci_api_key_public.pem [prodtestdb@oracle ~]$ cat oci_api_key_public.pem |
|
(ii) Go to User settings |
|
(iii) Click on API Keys |
|
(iv) Paste Api Key here (oci_api_key_public.pem) and click Add. |
Step 6: Now, Check
connection between on-premises server to OCI using OCI CLI.
[prodtestdb@oracle
~]$ oci iam user api-key list --user-id ocid1.user.oc1..aaaaaaauxyi78jw2jpvnae5zoucnvxhppqnpa3f5lnfuciphzwrtq
|
|
Step 7: We will Create Bucket
-OCI object storage for uploading files through OCI web console.
|
(i) Go to-> Object storage |
|
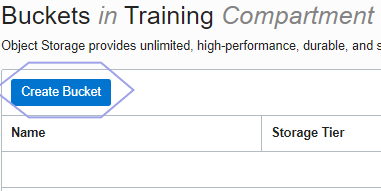
(ii) Click on Create Bucket |
|
(iii) Fill up the below details and click on Create Bucket. |
|
(iv) Copy the Namespace value and note it down. |
Step 8: Now, we are
ready to upload objects into our OCI object storage- Bucket from on-premises.
|
CLI For Upload File: Ø oci os object put -ns
<object_storage_namespace> -bn<bucket_name> -–file
<file_location> |
|
[prodtestdb@oracle]$ oci os object put -ns
bm626zuufa0a -bn My_bucket_B1 --file /Backup/PROD/RMAN/prod_dbbkp.tar.gz Upload ID: 96a15af0-2774-6e1b-6204-92debc0e844f Split file into 49 parts for upload. Uploaded object
|████████████████████████████████|100% 0d 00:10:56 { "skipped-objects":
[], "upload-failures":
{}, "uploaded-objects":
{ " prod_dbbkp.tar.gz ": { "etag":
"788e5d01-1329-6da7-b401-01360e99a364", "last-modified":
"Thu, 10 Dec 2020 06:14:02 GMT", "opc-content-md5":
"1B2N2X9AsgYgpAnT9QfCfg==" } } } |
|
CLI For Bulk Upload: Ø oci os object bulk-upload -ns
<object_storage_namespace> -bn <bucket_name> –src-dir <folder
location> [prodtestdb@oracle]$ oci os object
bulk-upload -ns bm626zuufa0a -bn EIIL_BUCKET –-src-dir
/backup/prodtest/bkp_set1.tar.gz |
v
Downloading
Files from OCI object storage Bucket into OCI compute Instance/Server:
|
To Download object from OCI bucket on different server or OCI compute Instance we first need to configure OCI CLI: Ø
Follow
the above mentioned steps -1, 2,3,4,5, & 6. |
|
CLI For Downloading Single
File: Ø oci os object bulk-download -ns <mynamespace>
-bn <mybucket> --download-dir <path/to/download/directory> --prefix
<myprefix>
[oracle@compute1 .oci]$ oci os object bulk-download -ns bm626zuufa0a -bn EIIL_BUCKET --download-dir /archback/backup/PRODTEST_BKP --prefix backup_101220.tar.gz { "data":
[ { "download-failures":
{}, "skipped-objects":
[] } ] }
|
|
CLI For Downloading Bulk
Files: Ø
oci os
object bulk-download -ns <mynamespace> -bn <mybucket> --download-dir <path/to/download/directory>
[oracle@compute1 .oci]$ oci os object bulk-download -ns
bm626zuufa0a -bn bucket-201120 --download-dir /u01 |
Reference Link:- https://github.com/oracle/oci-cli/blob/master/scripts/install/README.rst (For Script)


Sarfaraz Oracle Dba Blog: How To Transfer Data Between On-Premises To Oracle Cloud Infrastructure (Oci) Into Object Storage Using Oci Cli Command. >>>>> Download Now
ReplyDelete>>>>> Download Full
Sarfaraz Oracle Dba Blog: How To Transfer Data Between On-Premises To Oracle Cloud Infrastructure (Oci) Into Object Storage Using Oci Cli Command. >>>>> Download LINK
>>>>> Download Now
Sarfaraz Oracle Dba Blog: How To Transfer Data Between On-Premises To Oracle Cloud Infrastructure (Oci) Into Object Storage Using Oci Cli Command. >>>>> Download Full
>>>>> Download LINK