Showing posts with label Oracle Cloud (OCI). Show all posts

Friday, 19 February 2021

𝐀𝐮𝐭𝐨𝐧𝐨𝐦𝐨𝐮𝐬 𝐃𝐚𝐭𝐚𝐛𝐚𝐬𝐞𝐬 𝐂𝐥𝐨𝐧𝐢𝐧𝐠 𝐌𝐞𝐭𝐡𝐨𝐝𝐬


v   Autonomous Database Cloning


Use cases: 

·       Business requirements: Testing, Development or Analytics.

·       Database upgrade when a new version is available.


       Types of Clone:

·        Full clone: A full copy of the source database.

·        Refreshable clone: Changes on applied on the clone based on requests.

·        Metadata clone: A copy of the source database without user-data.


OCI CLI Clone Commands

Command

Description


ocidbautonomous-database create-from-clone

Creates a new full or metadata clone Autonomous Database.


ocidbautonomous-database create-refreshable-clone

Creates a new refreshable clone Autonomous Database.


ocidbautonomous-database list-clones

Lists the Autonomous Database clones for the specified Autonomous Database


ocidbautonomous-database manual-refresh

Initiates a data refresh for an Autonomous Database refreshable clone.


Friday, 11 December 2020

How to transfer data between On-premises to Oracle Cloud Infrastructure (OCI) into object storage using OCI CLI command.


v  Nowadays, Object storage services is mostly used because it allow storing files as objects in any volume of data and because of it data availability, scalability and security. We can  upload files in OCI object storage up to 2GB through web console. And For larger files we can use multipart upload using the API, Java SDK or Command Line Interface(CLI) .


 So, In this post I have explained how can we upload/download files from on-premises to OCI through CLI.


Step 1: Install OCI Command Line Interface (CLI)

[prodtestdb@oracle ~]$  bash -c "$(curl -L https://raw.githubusercontent.com/oracle/oci-cli/master/scripts/install/install.sh)"


Step 2: Note down the following information for setup OCI Configuration

(i)User OCID: ocid1.user.oc1..aaaaaaauxyi78jw2jpvnae5zoucnvxhppqnpa3f5lnfuciphzwrtq

(ii) Tenancy OCID: ocid1.tenancy.oc1..aaaaaaai3xkchy9xacyqsdpg7ncdoeeit0eirwcot66gqvnm2ntvipv4va

(iii)Region:  ap-mumbai-1


 Below are the following steps to find User, Tenancy,  & Region OCID:

(i) Go to ->User settings


Copy User OCID:


(ii) Go to -> Tenancy Details


Copy Tenancy OCID:


(iii) On Right side top click on-> Manage Region


Note down-> Region Identifier name


Step 3:  Now, We need to run one time  OCI configuration process that will store a config file under the ~/.oci directory.

[prodtestdb@oracle ~]$  cd /home/prodtestdb/bin

[prodtestdb@oracle ~]$  ll

total 8

-rwxr-xr-x 1 prodtestdb dba  235 Dec 09 17:09 oci

drwxr-xr-x 2 prodtestdb dba 4096 Dec 09 17:09 oci-cli-scripts


Ø  configure the CLI using “oci setup config” command.

[prodtestdb@oracle ~]$  oci setup config


Step 4: Now, OCI CLI by default authenticate information from $HOME/.oci/config so if tenancy OCID, user OCID & default region not present in config file then we must create it manually.

[prodtestdb@oracle ~]$ cd ~/.oci

[prodtestdb@oracle ~]$ pwd

/home/prodtestdb/.oci

[prodtestdb@oracle ~]$ ll

total 12

-rw------- 1 prodtestdb dba  397 Dec 09 21:47 config

-rw------- 1 prodtestdb dba 1675 Dec 09 21:46 oci_api_key.pem

-rw------- 1 prodtestdb dba  451 Dec 09 21:46 oci_api_key_public.pem


Add Tenancy OCID in compartment_id:

[prodtestdb@oracle ~]$  vi /home/prodtestdb/oci/config

[DEFAULT]

user=ocid1.user.oc1..aaaaaaauxyi78jw2jpvnae5zoucnvxhppqnpa3f5lnfuciphzwrtq

fingerprint=29:33:7c:1a:0d:ec:d2:88:10:fc:91:86:c4:a1:a8:1b

key_file=/home/oracle/.oci/oci_api_key.pem

tenancy=ocid1.tenancy.oc1..aaaaaaai3xkchy9xacyqsdpg7ncdoeeit0eirwcot66gqvnm2ntvipv4va

region=ap-mumbai-1


compartment_id= ocid1.tenancy.oc1..aaaaaaai3xkchy9xacyqsdpg7ncdoeeit0eirwcot66gqvnm2ntvipv4va


Step 5:  Now, we will upload the oci_api_key_public.pem  as API key through OCI web console.


(i) Copy oci_api_key_public.pem 

[prodtestdb@oracle ~]$ cat oci_api_key_public.pem

(ii) Go to User settings


(iii) Click on API Keys


(iv) Paste Api Key here (oci_api_key_public.pem) and click Add.


Step 6Now, Check connection between on-premises server to OCI using OCI CLI.

[prodtestdb@oracle ~]$ oci iam user api-key list --user-id ocid1.user.oc1..aaaaaaauxyi78jw2jpvnae5zoucnvxhppqnpa3f5lnfuciphzwrtq


Step 7: We will Create Bucket -OCI object storage for uploading files through OCI web console.

(i) Go to-> Object storage


(ii) Click on Create Bucket


(iii) Fill up the below details and click on Create Bucket.


(iv) Copy the Namespace value and note it down.


Step 8: Now, we are ready to upload objects into our OCI object storage- Bucket from on-premises.

CLI For Upload File:


Ø  oci os object put -ns <object_storage_namespace> -bn<bucket_name> -–file <file_location>


[prodtestdb@oracle]$ oci os object put -ns bm626zuufa0a -bn My_bucket_B1 --file /Backup/PROD/RMAN/prod_dbbkp.tar.gz


Upload ID: 96a15af0-2774-6e1b-6204-92debc0e844f

Split file into 49 parts for upload.

Uploaded object |████████████████████████████████|100%  0d 00:10:56

{

"skipped-objects": [],

"upload-failures": {},

"uploaded-objects": {

" prod_dbbkp.tar.gz ": {

"etag": "788e5d01-1329-6da7-b401-01360e99a364",

"last-modified": "Thu, 10 Dec 2020 06:14:02 GMT",

"opc-content-md5": "1B2N2X9AsgYgpAnT9QfCfg=="

}

}

}

CLI For Bulk Upload:


Ø  oci os object bulk-upload -ns <object_storage_namespace> -bn <bucket_name> –src-dir <folder location>


[prodtestdb@oracle]$ oci os object bulk-upload -ns bm626zuufa0a -bn EIIL_BUCKET –-src-dir /backup/prodtest/bkp_set1.tar.gz


v  Downloading Files from OCI object storage Bucket into OCI compute Instance/Server:


To Download object from OCI bucket on different server or OCI compute Instance we first need to configure OCI CLI:


Ø  Follow the above mentioned steps -1, 2,3,4,5, & 6.


CLI For Downloading Single File:

Ø  oci os object bulk-download -ns <mynamespace> -bn <mybucket> --download-dir <path/to/download/directory> --prefix <myprefix>


[oracle@compute1 .oci]$ oci os object bulk-download -ns bm626zuufa0a -bn EIIL_BUCKET --download-dir /archback/backup/PRODTEST_BKP  --prefix  backup_101220.tar.gz

{

 "data": [

      {

           "download-failures": {},

           "skipped-objects": []

      }

 ]

}


CLI For Downloading Bulk Files:


Ø  oci os object bulk-download -ns <mynamespace>  -bn <mybucket> --download-dir <path/to/download/directory>


[oracle@compute1 .oci]$ oci os object bulk-download -ns bm626zuufa0a -bn bucket-201120 --download-dir /u01


Reference Link:- https://github.com/oracle/oci-cli/blob/master/scripts/install/README.rst (For Script)

Tuesday, 1 December 2020

Creating Compartment & VCN (Subnet, Route Table, Internet Gateway, Security List, DHCP) In OCI


In this post I would explain how you can start your OCI journey from scratch. You will get to know the requirement for building architecture like - creating and configuring compartment, VCN, policies, etc. So that you can build your first OCI Instances.

v  Creating a Compartment in Oracle Cloud Infrastructure (OCI)


As given below let us have a look at following steps:


Step 1: Login to Oracle Cloud Infrastructure


Step 2: Select Compartment Menu

Click on hover over Identity option and click on Compartments


Step 3: Click on Create Compartment button.

Once inside Compartments menu, you will see “Create Compartment” button.


Step 4: Fill Compartment Details and Create Compartment.


Note:-  Following rules need to be followed related to compartment creation:


(i) Compartment name can contain only alphanumeric characters, along with periods, hyphens and underscores. (Spaces are not allowed in compartment names).

(ii)Compartment name can contain only alphanumeric characters, along with periods.

Hyphens and underscores (spaces are not allowed in compartment names).

(iii) Compartment name can be up to 100 characters long.

(iv) Compartment name should be unique within its parent compartment.

(v) Compartment description can be up to 400 characters long.

(vi) Compartments can be created up to 6 levels deep, not beyond that.


Now your Compartment is created..!! You should be able to see your newly created compartment in the list of compartments.


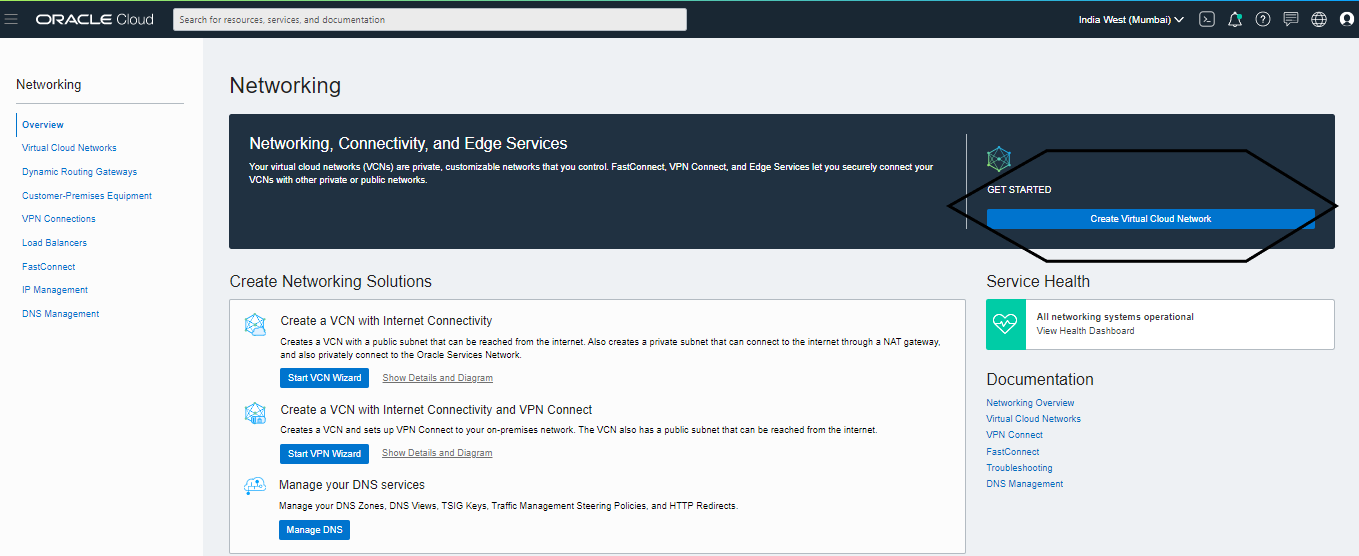
v Creating a Virtual Cloud Network (VCN) in OCI


There are two options for creating VCN in OCI:


(I) Create Virtual Cloud Network plus related resources: Automatically sets up a Virtual Cloud Network with access to the internet. You can set up firewall rules and Security Lists to control ingress and egress traffic to your Instances.

All related resources will be created in the same Compartment as the VCN.


(II) Create Virtual Cloud Network only: Creates a Virtual Cloud Network only.

 You’ll still need to set up at least one subnet, gateway and route rule to have a working Virtual Cloud Network.
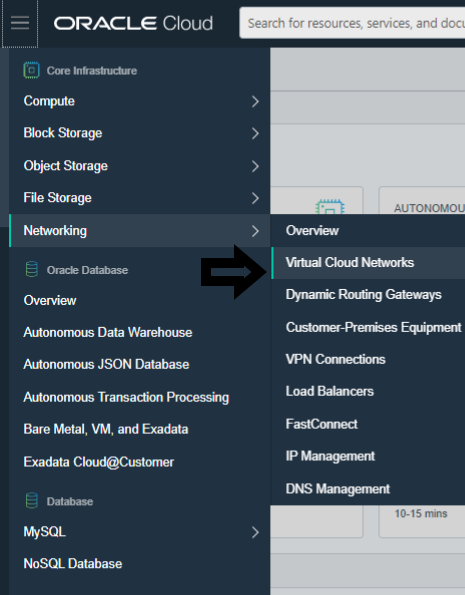


Step 1: Open the Console and in Menu, click Networking.

Select Create Virtual Cloud Network Only. (This option will not create the related resources like -subnet, route table,Internet Gateway, security List, DHCP Options)


Step 2: Select a compartment on the left that you have permission to work in.


Step 3: Click Create virtual cloud network.


Note: Enter a friendly name for the cloud network. It doesn’t have to be             unique,and it cannot be changed later in the Console.


Now our VCN is created..!!


Ø Creating Security List

At First, I’m going to show you how to add Ingress rule in the default security list in VCN-T1 after that we will create two new security list for public & private subnet.


Step 1:

On the Resources menu, click Security Lists. Click on the Default Security List.


            Step 2:

Click on -> Add Ingress Rule and add the following values as shown below:

 Source Type: CIDR

Source CIDR: 0.0.0.0/0

IP Protocol: TCP

Source Port Range: All

Destination Port Range: 80

Click on Add Ingress Rules at the bottom (as per below Screenshot).


ü  Note: A default Security List was created for this VCN, but we will not use it.


Ø  We will create two new Security Lists, one for the public subnet and one for the    private subnet. This way, we can control the types of traffic (protocol and port) will be allowed in and out of the instances in public and private subnets.


 Step 1: To create a new Security List, on the Resources menu, click Security Lists.


Step 2: The Create Security List dialog box, use the information below:

(i) Name: Private-Security-List

Create In Compartment: The compartment name (e.g. Training)


Click + Another Ingress Rule, use the information below:


Source Type: CIDR

Source CIDR: 0.0.0.0/0

IP Protocol: TCP

Destination Port Range: 22

(ii) Click + Another Egress Rule, use the information below and click Create Security List:


Source Type: CIDR

Source CIDR: 0.0.0.0/0

IP Protocol: TCP

Destination Port Range: All

(iii) Click Create Security List.


The Security Lists were created..!!


Step 3: Click Create Security List again.

(i) Name: Public-Security-List

Create In Compartment: The compartment name (e.g. Training)


Click + Another Ingress Rule, use the information below:


Source Type: CIDR

Source CIDR: 0.0.0.0/0

IP Protocol: TCP

Destination Port Range: 22

(ii) Click + Another Egress Rule, use the information below and click Create Security List:


Source Type: CIDR

Source CIDR: 0.0.0.0/0

IP Protocol: TCP

Destination Port Range: All

(iii) Click Create Security List.


The Security Lists were created..!!


v  Create Internet Gateway in Oracle Cloud Infrastructure (OCI)

Step 1: Click Create Internet Gateway.


Step 2: In the Create Internet Gateway dialog box, use the information below and click Create Internet Gateway:

Name: internet-gateway1

Create In Compartment: The compartment name (e.g. Training)


v  Now, Creating Route Table in Oracle Cloud Infrastructure (OCI)

Step 1: Click Create Route Table

In the Create Route Table dialog box, use the information below:


Step 2: Click + Additional Route Rule, use the information below and click Create Route Table:

Name: Route_Table_VCN-T1

Compartment: The compartment name (e.g. Training)

Target Type: Internet Gateway

Destination CIDR Block: 0.0.0.0/0


Step 3: Click on Create Route Table.


The Route Tables were created!!


v  Creating Subnets in Oracle Cloud Infrastructure (OCI)


Subnets are logical divisions of a virtual cloud network. We can create one or more subnets in a VCN each of which has a range of non-overlapping IP addresses. This range of address is determined by CIDR blocks.


Step 1: Select Virtual Cloud Networks Menu, hover over Networking option and click on Virtual Cloud Networks.


Step 2: Select correct VCN’s compartment.


Step 3: Click on VCN name

After you select correct compartment, scroll up to find list of VCNs in that compartment.


You should be able to see your existing VCN in it. Click on the Name of the VCN to navigate to VCN page.


Step 4: Click on Create Subnet button.


           Step 5: Enter details and Create PUBLIC Subnet

NAME: PUBLIC-SUBNET-VCN-T1

SUBNET TYPE: REGIONAL (RECOMMENDED)

CIDR BLOCK: 172.168.0.0/24

ROUTE TABLE: Route_Table_VCN-T1

SUBNET ACCESS: PUBLIC SUBNET

DHCP OPTIONS: Default DHCP option for VCN-T1

SECURITY LIST: Public-Security-List / Default security List


 Step 6: Enter details and Create PRIVATE Subnet

NAME: PRIVATE-SUBNET-VCN-T1

SUBNET TYPE: REGIONAL (RECOMMENDED)

CIDR BLOCK: 172.168.1.0/24

ROUTE TABLE: Route_Table_VCN-T1

SUBNET ACCESS: PRIVATE SUBNET

DHCP OPTIONS: Default DHCP option for VCN-T1

SECURITY LIST: Public-Security-List / Default security List


Step 6: Validate Subnet Created


You should be able to see the newly created subnet under list of subnets in the VCN.


So, now you are ready to create you’re Compute Instance in Oracle Cloud Infrastructure (OCI)..!!