At First, we will enable DB auditing in
RAC database:
Set the audit trail to DB,EXTEDED :
SQL>ALTER SYSTEM SET AUDIT_TRAIL=DB,EXTENDED
SCOPE=SPFILE;
Restart the database to check that parameter is taken
in to effect and then query again
SQL> show parameter audit_trail
|
NAME |
TYPE |
VALUE
|
|
audit_trail |
string |
DB_EXTENDED |
Now, ADD BOTH host to Audit Vault:
Log as "AVADMIN" to AV and navigate to the tab “HOST”- Register put the host name and the Ip address
Step1: Register
Both RAC Node 1 & 2.
E.g:
|
Host Name: |
RAC1 |
|
Host IP: |
192.168.10.121 |
|
Host Name: |
RAC2 |
|
Host IP: |
192.168.10.122 |
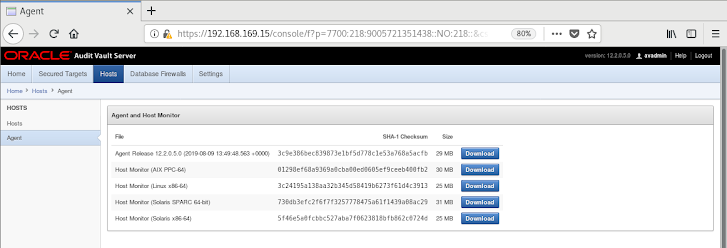
Now we can see the “Agent Activation
Key” is automatically generated on the host entry. This key is required in
order to activate the agent on the Database Server once we deploy the agent on
the database server.
Step2:
[root@avdf ]# java –version
[root@avdf]#mkdir
–p /u01/app/oracle/avdf_home
[root@avdf]# java
-jar agent.jar -d /u01/app/oracle/avdf_home
Step3:
[root@avdf]# cd
/u01/app/oracle/avdf_home/bin
[root@avdf
bin]#./agentctl
start –k
Enter
Activation Key:
Note: - Above activation
will ask the Activation key please copy and paste it from the "Agent
Activation Key" from AVDF host location.
Step 4: Create the database user
(this user will be used during configuring the secured target in AVDF)
SQL> create user av_agent identified by av_agent;
Step 5: Granting privileges to AV_AGENT
[oracle@avdf]$ cd
/u01/app/oracle/avdf_home/av/plugins/com.oracle.av.plugin.oracle/config
Sql> @oracle_user_setup.sql
Enter value for 1: av_agent
Enter value for 2: setup
Sql> @oracle_user_setup.sql
Enter value for 1: av_agent
Enter value for 2: SPA
Sql> @oracle_user_setup.sql
Enter value for 1: av_agent
Enter value for 2: ENTITLEMENT
Sql> @oracle_user_setup.sql
Enter value for 1: av_agent
Enter value for 2: REDO_COLL
Step 6: Secured target setup. Add Both RAC Node 1 & 2.
Note: The USER we will passed here is the same user “AV_AGENT” which we setup in our Secured Target database. Add the details as mentioned above to add your database in AVDF fill the necessary information and hit save.
Step 7: Add Audit trail (TYPE- Table-sys.AUD$ & Directory- adump location)
Note: Fill
the above details as per your target Database information and hit save.
After this
state, logs are start getting generated in target DB servers.


No comments:
Post a Comment